In this article, you will discover the essential steps to effectively connect a Rightline Bag to your roof rack. Whether you’re planning a road trip, have limited interior space, or simply need to transport extra belongings, this product provides a convenient solution. By following these straightforward instructions, you’ll be able to securely attach your Rightline Bag to your roof rack, ensuring a safe and worry-free journey. Get ready to maximize your storage capacity and embark on your next adventure with confidence!

This image is property of Amazon.com.
Preparation
Before you begin attaching your Rightline bag to your roof rack, it’s important to ensure compatibility. Check the manual or product details to confirm that your roof rack is suitable for use with a Rightline bag. Additionally, gather all the required tools for the job, including the bag itself, straps, and any other accessories that may have come with it. Lastly, check your roof rack’s weight capacity to make sure it can safely accommodate the weight of your bag and its contents.
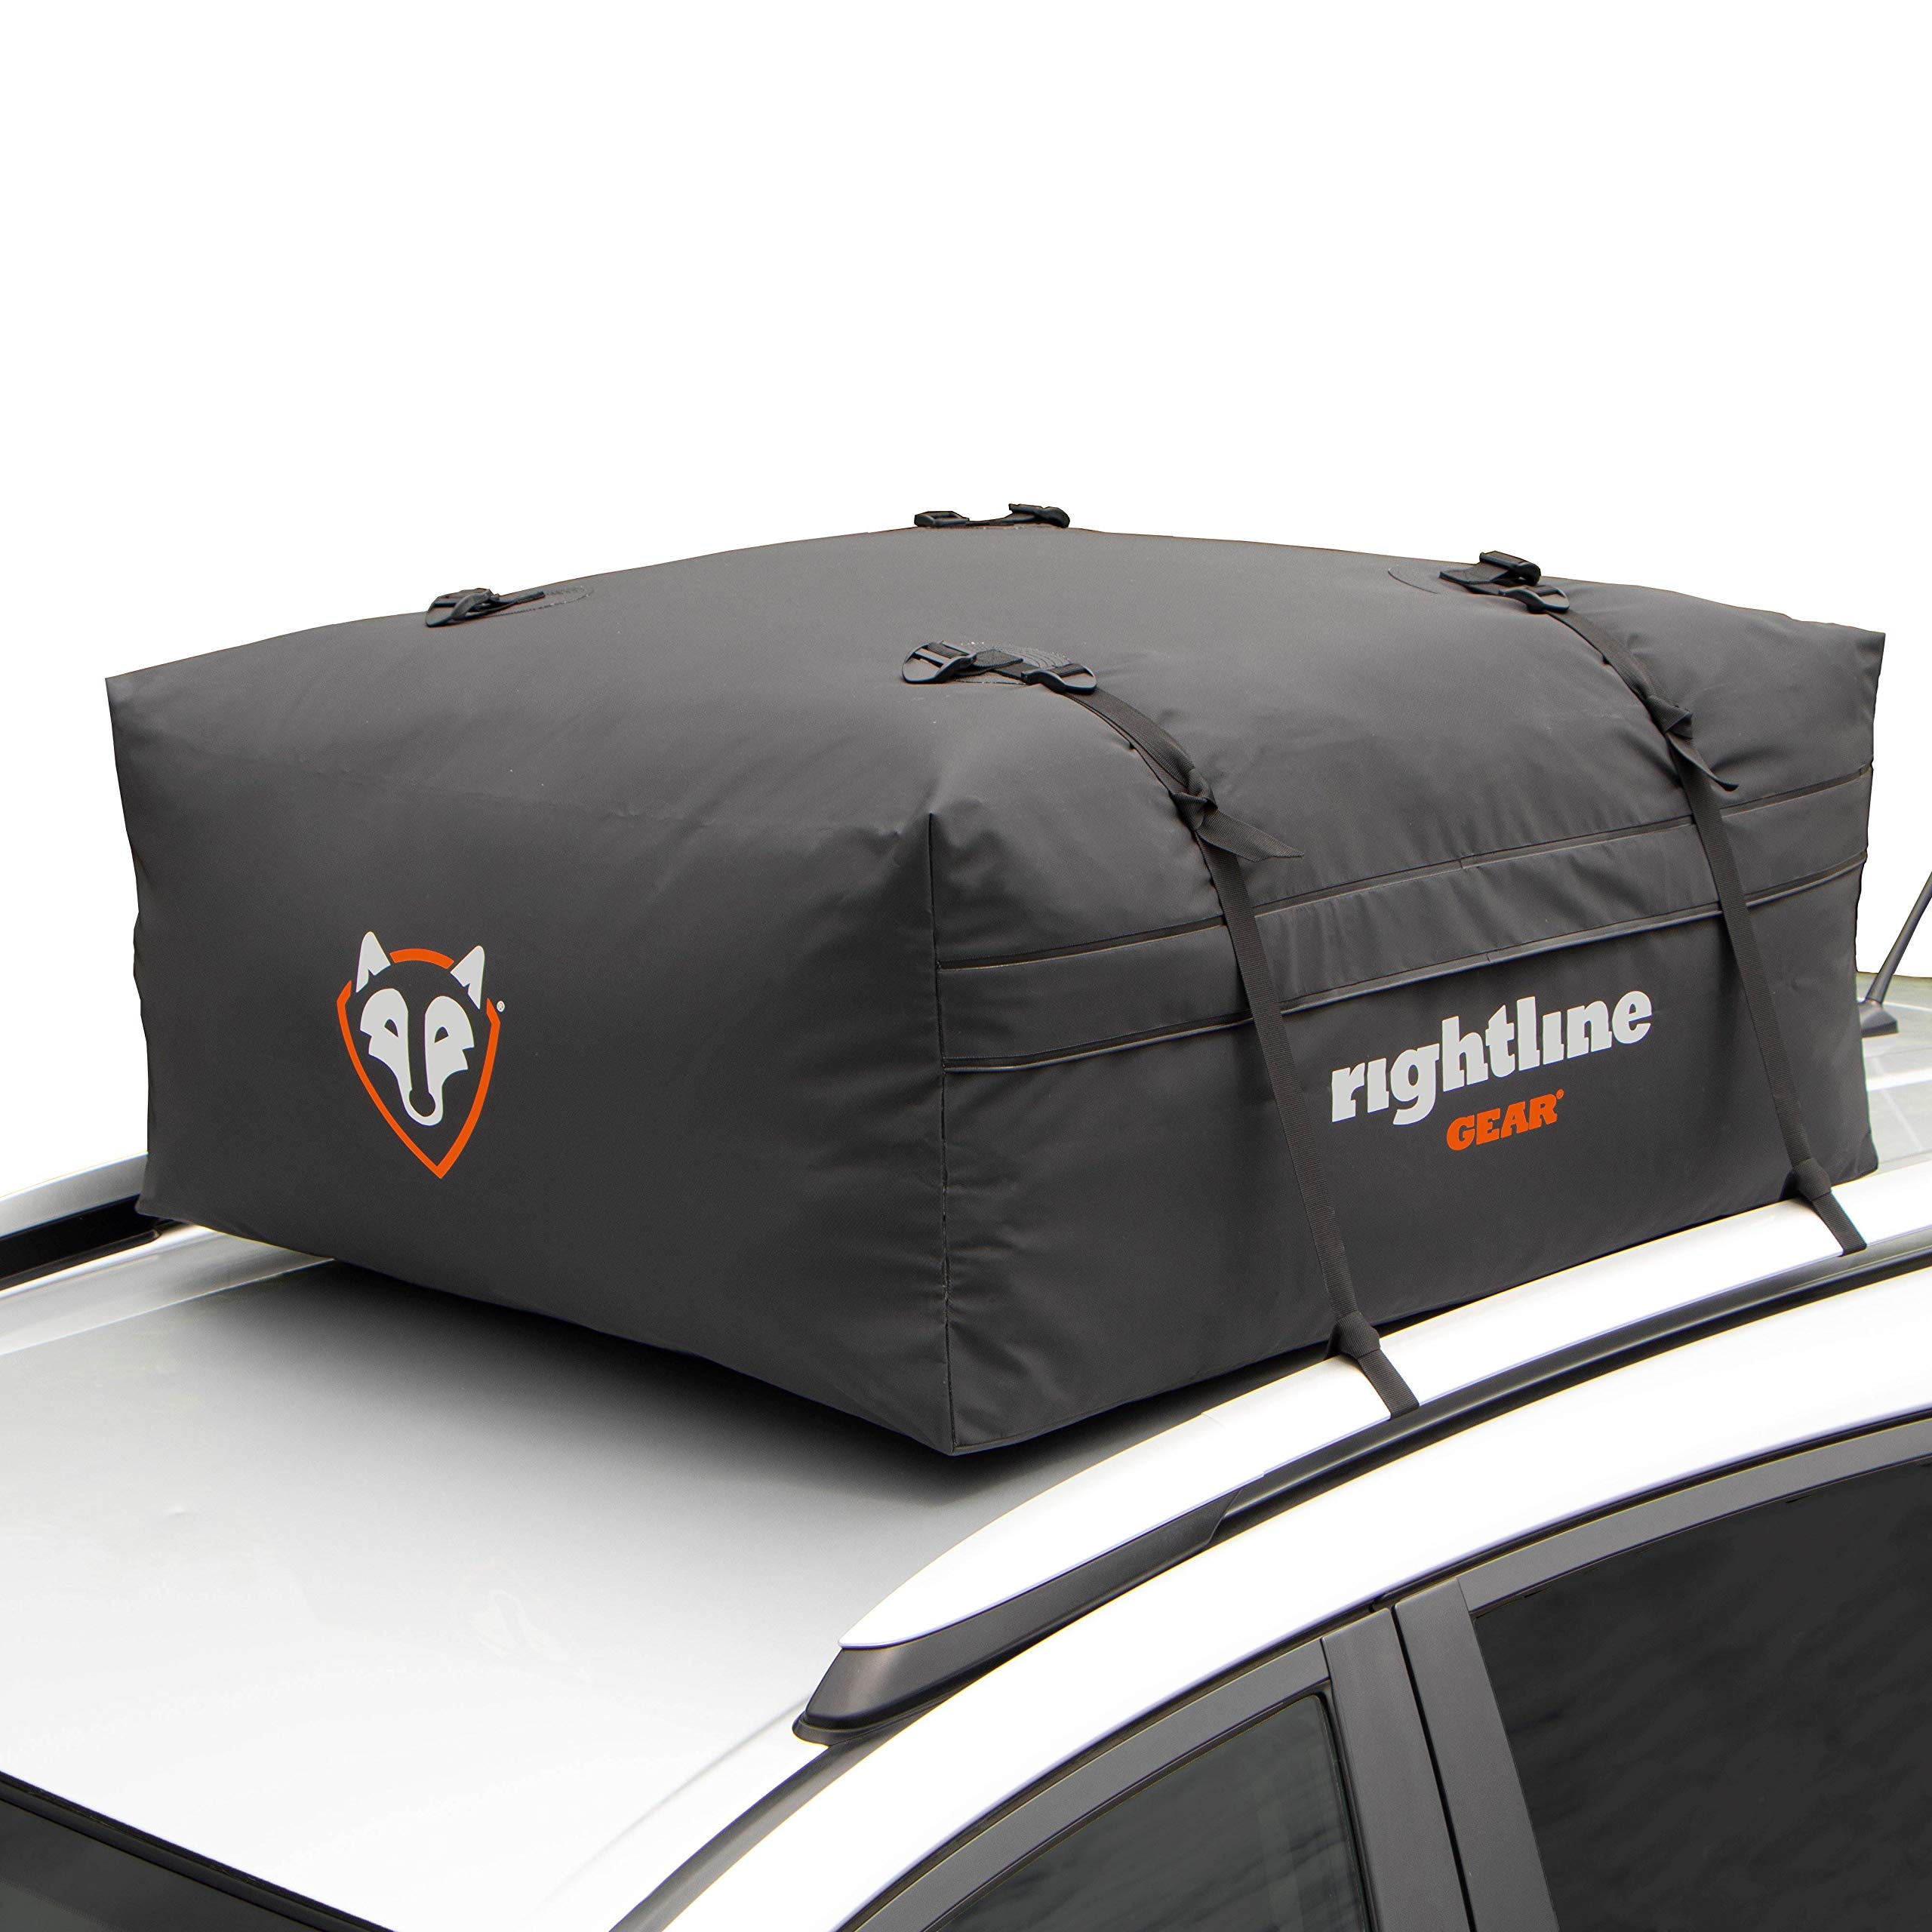
Bag Placement
Choosing a suitable location for your Rightline bag is essential for a secure and efficient setup. Opt for a spot on your roof that is both flat and sturdy. Before placing the bag, take a moment to clean the roof surface in that area, removing any dirt or debris. Position the bag in the chosen location, making sure it is centered and aligned with the roof rack.
Attaching Straps
To securely attach your Rightline bag to the roof rack, you’ll need to properly thread the straps beneath it. Unfold and position the straps so that they are easily accessible. Next, carefully thread the straps beneath the roof rack bars, ensuring they are evenly positioned. Once the straps are in place, secure them tightly onto the bag, making sure they are snug and won’t come loose during your journey.
Tightening Straps
To ensure a tight and secure connection, it’s important to apply tension evenly on the straps. Start by pulling on each strap one by one, evenly distributing the tension. To secure the straps, use the cam buckles provided with your Rightline bag. These buckles allow you to easily tighten and release the straps as needed. After tightening the straps, give them a gentle tug to check for any slack. Adjust as necessary to achieve a snug fit.

This image is property of Amazon.com.
Creating a Secure Connection
With the straps properly tightened, it’s crucial to double-check the attachment points. Ensure that all the straps are securely fastened to the bag and that there are no loose ends that could potentially unravel during transit. Take a moment to inspect the connection from all angles to ensure a solid and secure setup. If any straps are found to be loose, adjust them accordingly to create a more secure connection.
Weatherproofing
To protect your belongings from the elements, it’s important to properly weatherproof your Rightline bag. Begin by ensuring the bag’s zipper is fully closed to prevent any water or moisture from seeping in. Additionally, be mindful of any exposed areas, such as straps or buckles, that may need additional sealing. Depending on the weather conditions, you may want to consider using a waterproof cover or tarp to provide an extra layer of protection.

This image is property of Amazon.com.
Test the Connection
Before hitting the road, it’s crucial to test the connection between your Rightline bag and the roof rack. Gently shake the bag to ensure it is securely attached and that there is no noticeable movement. This step is important in highlighting any potential issues or loose straps that may need further adjustments. Once you’re satisfied with the stability of the bag, take a short test drive around your neighborhood to further assess its performance.
Monitor the Bag
Throughout your journey, it’s important to regularly monitor the tightness of the straps on your Rightline bag. Periodically check each strap to ensure they remain securely fastened and are not showing signs of loosening. Additionally, inspect the bag for any signs of wear and tear, such as frayed or damaged straps. It’s crucial to address any issues promptly to avoid the risk of the bag shifting or coming loose during transit.

This image is property of www.etrailer.com.
Removing the Bag
When it’s time to remove your Rightline bag from the roof rack, follow these steps to ensure a safe and hassle-free process. Start by loosening and releasing the straps from the bag, allowing for easy detachment. Take extra care when removing the bag, especially if it is heavy or contains delicate items. If needed, enlist the help of a friend or family member to assist in safely lifting and carrying the bag. Finally, store the bag properly in a clean and dry area to ensure its longevity and usability.
Tips and Considerations
To ensure a successful and stress-free experience when connecting your Rightline bag to your roof rack, here are some additional tips and considerations to keep in mind:
- Always follow the manufacturer’s instructions for your specific Rightline bag model. These instructions may provide additional guidance or specifications that are essential for proper installation.
- Don’t hesitate to ask for assistance if needed. Connecting a roof bag can sometimes be challenging, especially for individuals who are not familiar with the process. Reach out to a friend or family member who may have experience in this area or consult professional advice if necessary.
- Consider weight distribution when loading your Rightline bag. Distributing the weight evenly across the bag will not only ensure a more stable and secure connection but also contribute to safer driving conditions. Avoid overloading one side of the bag, as this can cause imbalance and lead to difficulties during your journey.
By following these steps and taking the necessary precautions, you can successfully connect your Rightline bag to your roof rack with confidence. Whether you’re embarking on a road trip, moving, or simply need extra storage space, a properly installed and secured roof bag will provide you with the peace of mind you need for a smooth and enjoyable journey.

This image is property of i.ytimg.com.